Attributes/Table Popup Tab
The Attributes/Table Popup tab configures the default table popup that appears when a feature on this layer is interacted with. A separate, additive Custom Modal Popup can be configured on its own tab; see Custom Modal Popup Tab.
After configuring the layer name and required source properties, a table of layers and their attributes will appear.
Table Popup Type
At the top of the tab, the Table Popup Type radio chooses how (or whether) the table popup opens for this layer. The default is Click, matching the legacy behavior.
None — The table overlay popup never opens for this layer. The layer is not queried on click for the table popup, but it is still queried if a Custom Modal Popup is configured (see Custom Modal Popup Tab). Use this when you only want a modal popup and want to suppress the default attribute table.
Click (default) — Click a feature to open the table popup at the click point. Same as the legacy default.
Hover — The cursor settling on a feature for ~250 ms opens the table popup at the cursor position. Moving the cursor back over empty map closes the popup. Clicks on a hover-only layer are no-ops (no marker, no popup change). Useful for previews where the user can scan many features quickly without clicking each one.
Note
The Table Popup Type setting only governs the table popup. The Custom Modal Popup is always click-driven regardless of this setting. A layer can have Table Popup Type = None and a Custom Modal Popup enabled — clicking opens the modal, and the table overlay stays out of the way.
Note
Hover queries are debounced (~250 ms): the actual layer query fires only after the cursor settles. For remote ESRI/WMS layers this keeps request load to ~1 request per cursor pause rather than several per second while moving.
Configuring attribute fields
Within this table, fields can be configured for interaction in two ways:
When a feature is selected (via click or hover, depending on the Table Popup Type), the popup displays the feature’s attributes. You can hide attributes from the popup by unchecking the “Show in popup” column.
Fields can be linked to variable inputs. See the Variable Inputs section for details. In the “Variable Input Name” column, add the desired variable input for the field whose value will be set when a feature is selected. Variable-input writes happen on both click and hover popups, so other widgets on the dashboard can follow the active feature.
Note
You can configure a variable input in the attributes table without adding a separate variable input visualization to the dashboard. For example, a chart can reference a new variable input, and a map field can update that variable. When a map feature is interacted with, the chart updates automatically with the field value—no need to change a dropdown or text input. See the example below.
If the layer loads correctly, a static table will display the available attributes.
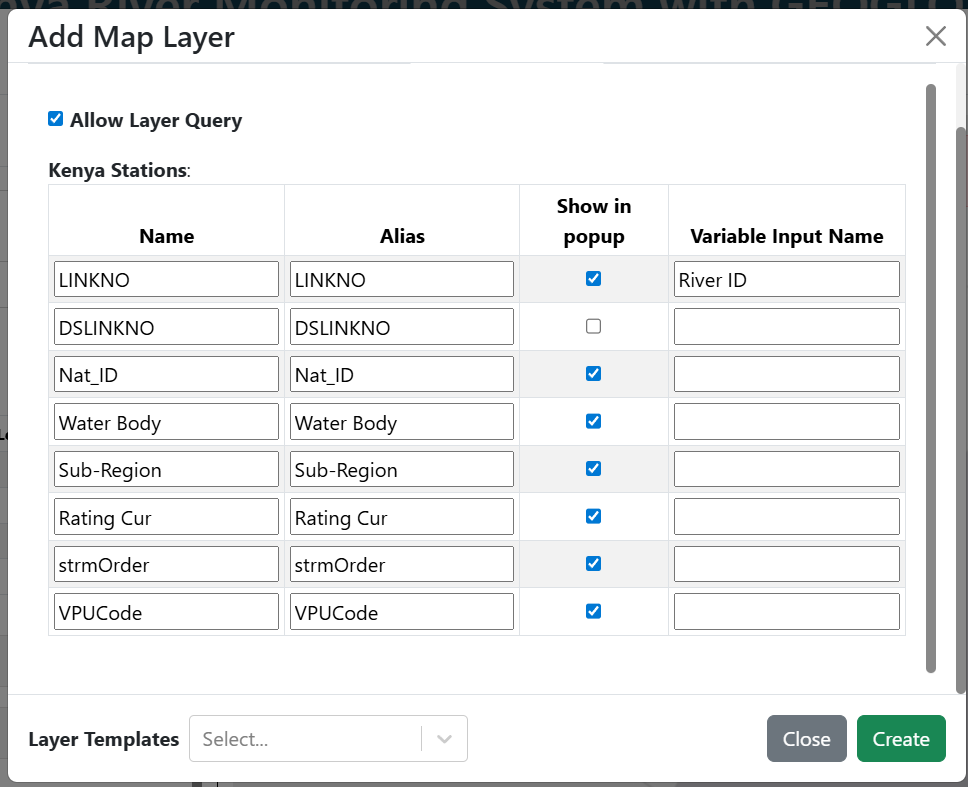
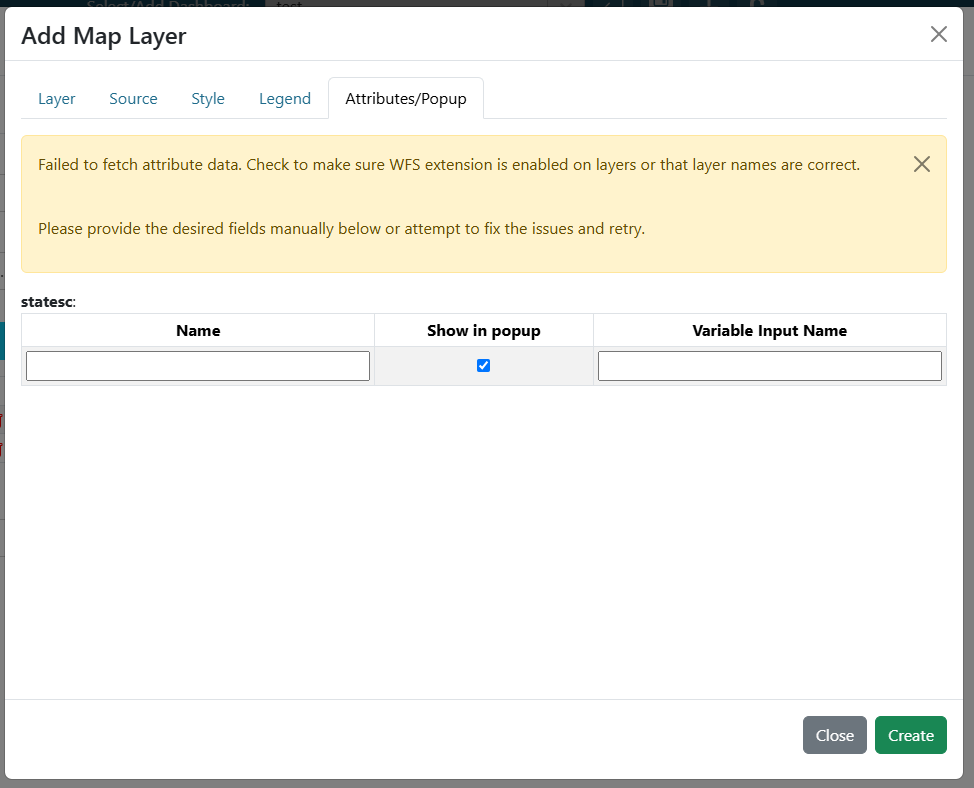
If the layer loads incorrectly, a dynamic table will appear, allowing you to add fields manually. New rows can be created by tabbing through the inputs.
If the layer loads correctly but no attributes are found, no table will be shown and a warning will indicate that no attributes were found.
Backward compatibility
Dashboards saved before the Table Popup Type radio existed used a single Allow Layer Query checkbox stored as queryable: true | false on the layer. Those dashboards continue to work without any migration:
Legacy
queryable: false→ resolves to Table Popup Type = None.Legacy
queryable: true(or absent) → resolves to Table Popup Type = Click.
Re-saving a layer in the UI writes the new tablePopupType field and removes the legacy queryable key.